Locations
Mine Amber from red veins in the Revelwood Shroud. A documented search area is the deep Shroud cavity between Abandoned Hunter Camp and Hidden Hollow Tomb, north of the Revelwood Ancient Spire. The current deposit listing describes this area.
Open the deposit listing and select “Where to mine Amber”. Locate a vein near the search area before travelling; the separate loose-item list is not a guide to an exposed mining deposit.
The spire is a useful starting point if unlocked. Plan your descent around the selected vein and a visible way out, rather than jumping into the cavity just because it is nearby.
Read the location maps
The maps below use the Amber mining-deposit layer. The orange circles with an amber icon are deposits; the large popup identifies a landmark, not the mineral you should swing at.
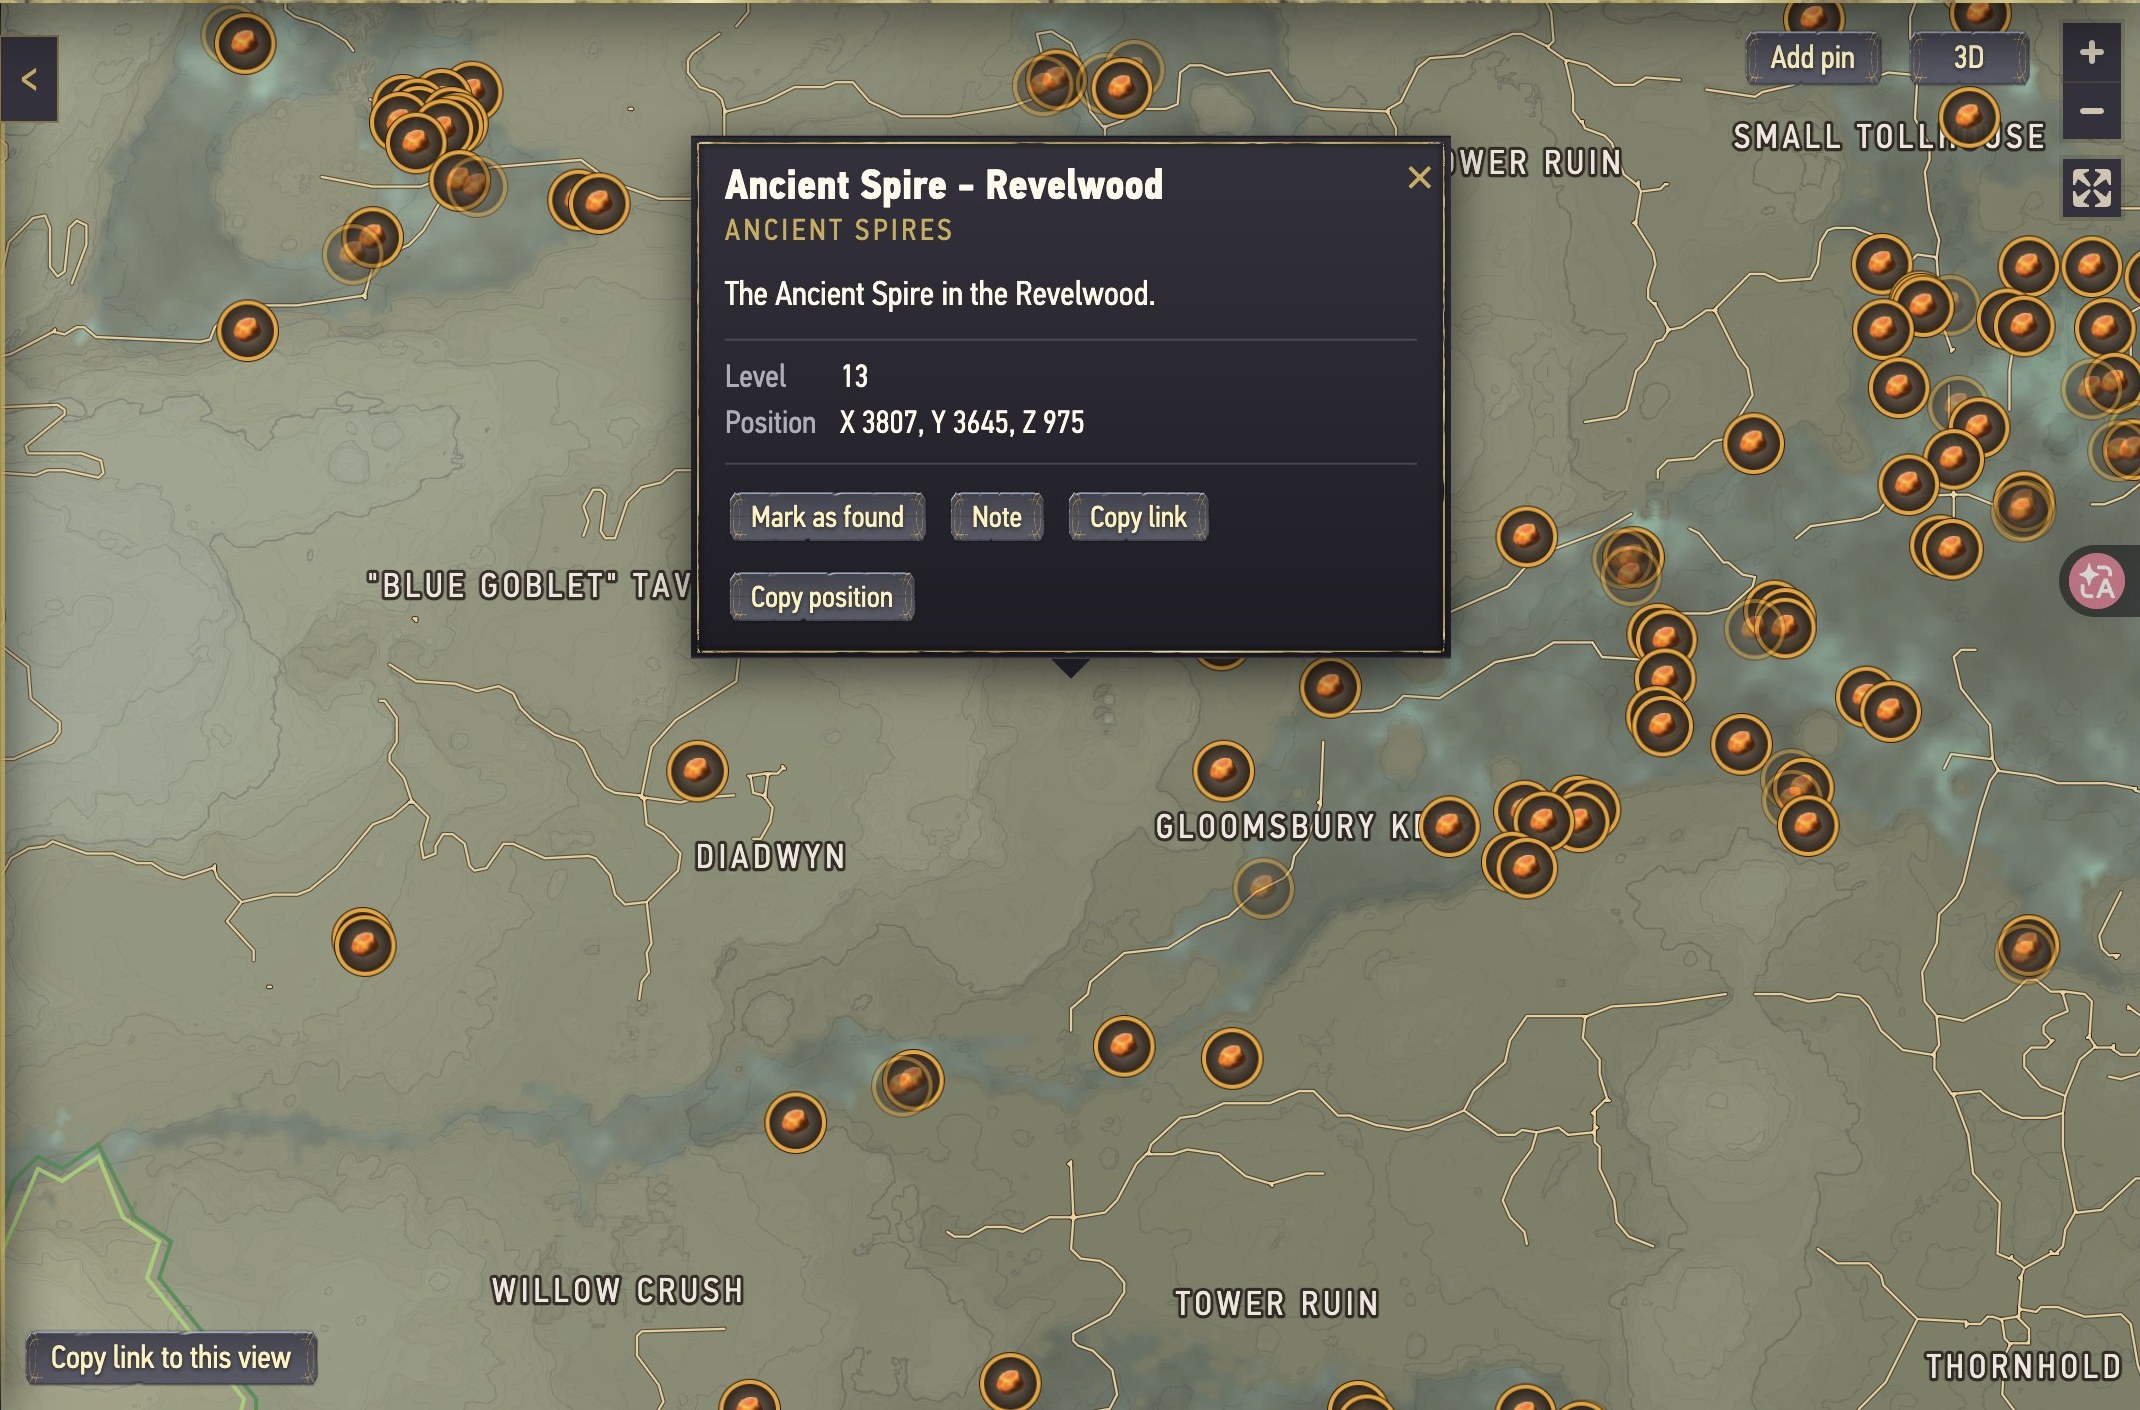
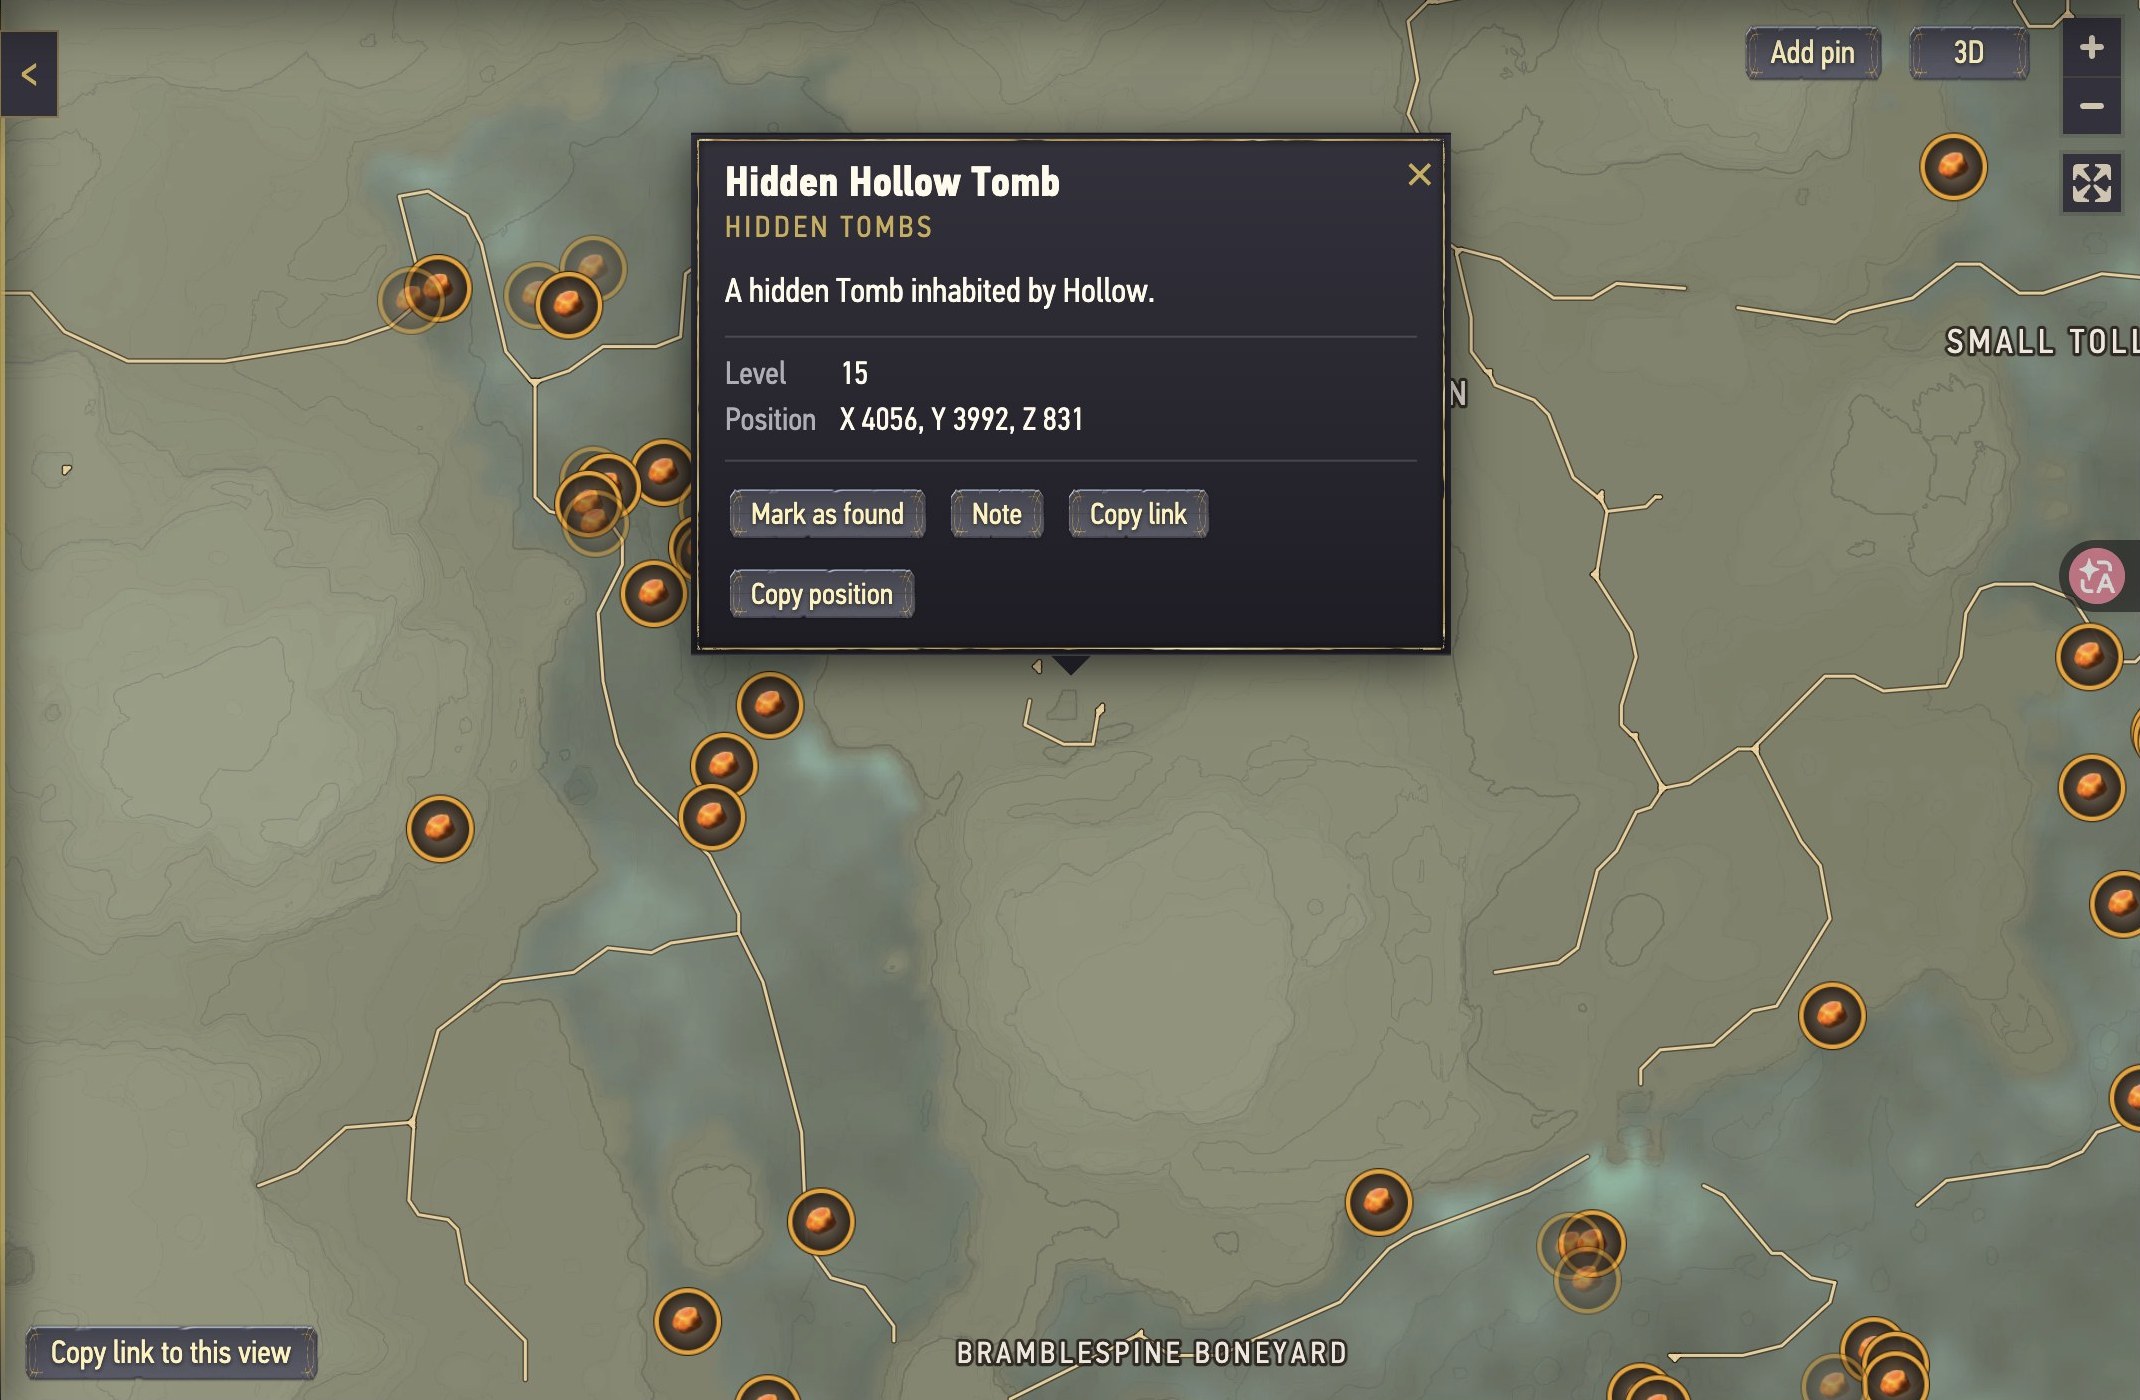
Open the Tomb-area Amber map ↗. Keep the Amber layer enabled and search Hidden Hollow Tomb if you need its landmark popup. These are location references, not a traced descent or exit route. Abandoned Hunter Camp was not found in this map's search during collection; use the visible named landmark and deposit markers instead.
Before you go
- Repair your pickaxe. Check durability at home and take a spare if you want more than a brief mining stop.
- Prepare food, Rested and combat equipment. Leave space for the material you came for rather than carrying unused building supplies.
- Check the area's Shroud warning. If your protection is insufficient, return to Flame progression. Extra ambition does not replace access to the area.
- Name the recipe you are supplying. Amber is used in several kinds of crafting, so count the exact amount needed before descending.
- Identify an exit on the way in. Include the climb or walk out when judging how much time you can spend mining.
Use the beginner guide if you are still getting your preparation and travel tools in place.
Mining route
- Start from the unlocked Revelwood Ancient Spire or another explored approach. Locate the two named landmarks and your chosen deposit on the map.
- Approach the cavity from a usable edge. Look for a route that lets you reach the vein and return. Check your remaining Shroud time after entering the fog.
- Inspect the exposed mineral. Look for the red amber vein described by the resource reference. Lighting can change its appearance, so colour is a starting clue rather than the final check.
- Mine a test piece. Confirm Amber in the pickup notification or inventory. If you receive clay, dirt or stone, move to the mineral itself or check another mapped deposit.
- Gather your planned quantity and leave. Stop if your pickaxe is nearly broken or the timer leaves too little margin for the exit. A smaller useful load is preferable to an unfinished return.
- Record the deposit for later. Mark a reachable location on your in-game map, then unload the material at home.
Success check: the Amber count increases while mining, and you can leave the Shroud with the batch you need. Confirming the item name matters more than matching a screenshot's exact shade.
Recognize and confirm Amber
This mining frame from Gaming Tutorials with Johny shows the mineral surface around the pickaxe's targeting area and the Amber ×7 pickup notification on the left. Revelwood Stone also appears in the list: nearby rock can give another material, so check for Amber specifically after a test swing.
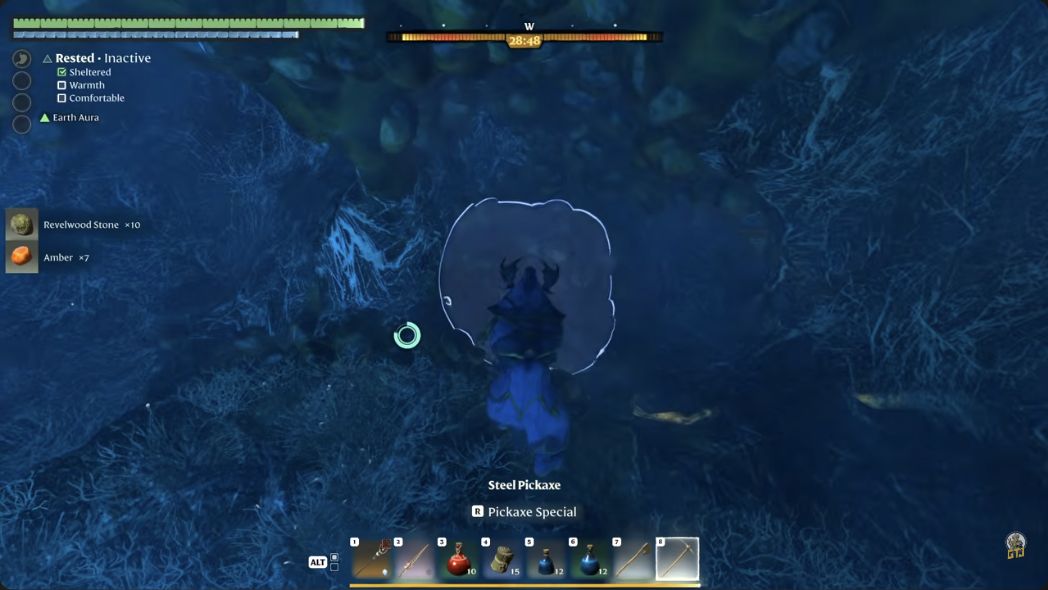
This is an in-progress mining example, not an untouched vein colour reference. The Shroud tints the scene blue, and the blue outline is the pickaxe targeting overlay. Inspect the exposed mineral around it, then use the pickup name to confirm the material. The displayed ×7 is an example from the creator's session, not a guaranteed yield.
Video reference
Where to Find Amber (2 Easy Spots Near the Spire) – Enshrouded
Gaming Tutorials with Johny
A short mining example and two location demonstrations. Use the current deposit map when planning your own trip.
Watch on YouTube ↗Jump to 00:06 — Amber pickup, 00:15 — first location on the map or 00:35 — second location on the map. These scenes were visually checked on November 1, 2026.
The video shows separate examples: its first map places the player south-east of the Spire, while its second map places the player north-west of it. Do not treat the introductory mining frame or either video marker as the Tomb-area deposit pictured above. The creator labels the guide for 1.0; its exact game build and a complete safe route have not been independently established here. The creator's equipment and timer are their own setup.
Crafting
Amber is a raw crafting material: the following recipes use it directly. It does not need the tin or iron smelting process.
| Example target | Amber and other ingredients | Crafter and requirements |
|---|---|---|
| Healer Tunic | 6 Amber, 4 Indigo Plant, 4 Copper Bars, 3 Giant Critter Scales, 1 Goo | Alchemist, Mortar; Flame level 3 unlock |
| 20 Fire Bolt III | 3 Amber, 4 Resin | Manual Crafting |
The crafted Healer Tunic entry lists its station and unlock, while Manual Crafting lists the spell batch. These are examples for setting a gathering target, rather than a claim that either is your best current upgrade.
Check the target recipe in your game before committing the material. Collecting six Amber for a tunic is not enough if the Mortar or the rest of its ingredients are still missing. For combat priorities, see the mage guide.
FAQ
Amber vs resin
No. They are separate ingredients; the Fire Bolt III example needs both. Check that your mined resource is named Amber. Do not use a stack of Resin as proof that you have completed an amber gathering trip.
Amber vs clay
Mine a small test amount and read the inventory name. The clay guide covers Lump of Clay. Neither the presence of a brown surface nor a nearby map landmark guarantees that every exposed patch is the material you want.
How much to mine
Set a recipe target first and stop while you can still return. If you have more time, confirm another accessible vein for a later visit. This route does not rely on a two-minute yield promise or a relogging loop.
Sources
Checked October 31, 2026, for the 1.0 era. The linked deposit database identifies its data as game build 25988036. The travel sequence and packing advice are editorial recommendations; the site has not timed or playtested this route in-game.
- Amber reference
- Amber: deposit map and crafting uses
- Healer Tunic: complete crafted recipe and unlock
- Manual Crafting: Fire Bolt III
Visual references
Media checked November 1, 2026. The current deposit listing was also rechecked on that date. Map screenshots are from an unofficial fan map, with game imagery belonging to Keen Games.
- Revelwood Spire area, Amber layer: submitted screenshot inspected; popup identifies the Spire, not an individual mining target.
- Hidden Hollow Tomb area, Amber layer: submitted screenshot inspected; the Tomb and Amber markers are different things.
- Gaming Tutorials with Johny — original video: actual pickup frame at approximately 00:06.89; maps checked at 00:15 and 00:35, with additional mining/cave scenes inspected. Footage verification is not an in-game playtest by this site.