
Locations
Mine Tin Ore from veins in the Nomad Highlands Shroud. Mines and cave passages are useful places to look; the Tin Ore reference identifies this as the main source area.
Use Mining Rift as a named search landmark. Its location page lists tin deposits nearby. Open the Tin Ore listing, choose “Where to mine Tin Ore”, and select a deposit in that area. A deposit labelled as being at the surface may still be inside the Shroud.
The Mining Rift database lists two sites with the same name. For this trip, choose the Nomad Highlands site, rather than the one in Veilwater Basin.
Prefer a location with an approach and exit you can identify. A larger deposit is only useful if you can reach it, mine and leave within your current protection.
Map example: Conway Camp
For a specific alternative to Mining Rift, open the Tin Ore deposit about 170 m north-west of Conway Camp. The map below shows its Tin Ore popup and the camp label together. This is a separate deposit, not a picture of Mining Rift.
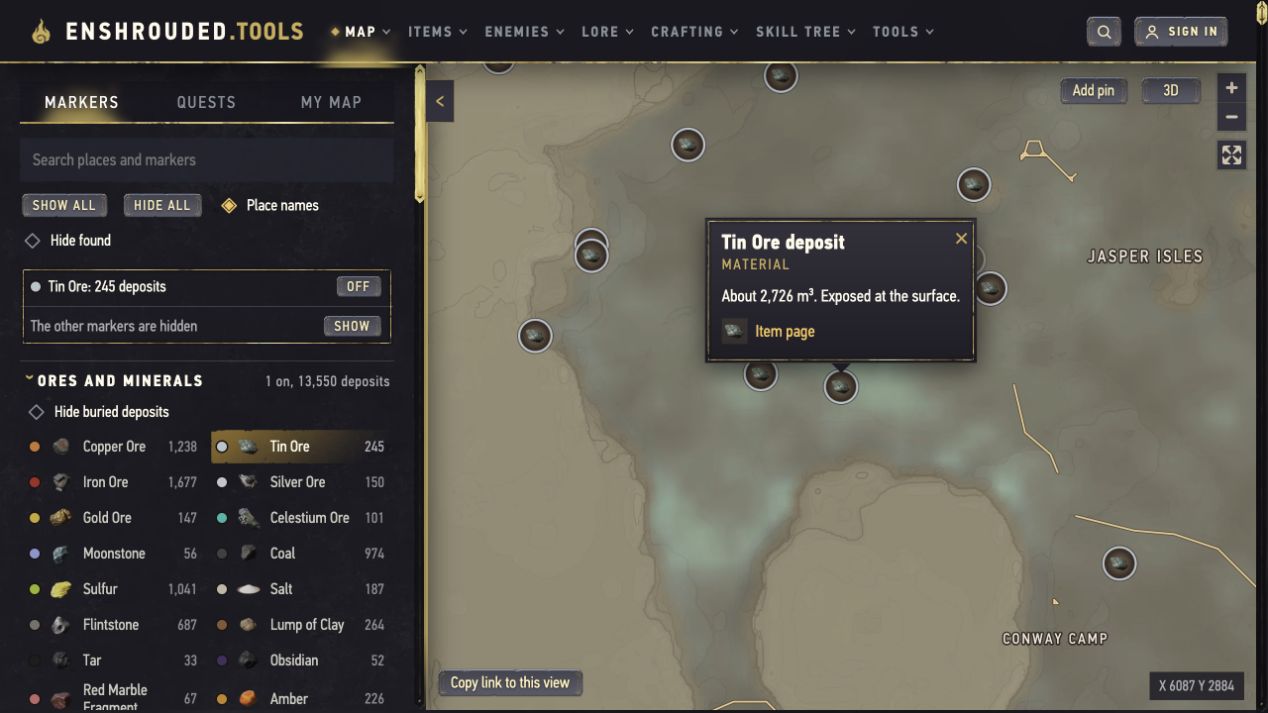
Open this deposit on the live map ↗. Turn on Tin Ore, keep Conway Camp in view and inspect the selected deposit before choosing an approach. This is a location reference, not a traced walking route; an exposed deposit can still be in the Shroud.
Before you go
A surface deposit can still be in the Shroud. Plan the exit before you start mining.
- Repair your pickaxe and take spare capacity. Check both durability and backpack space before leaving; bring a spare tool if you expect a long session.
- Eat and obtain Rested at home. Keep your combat equipment ready rather than filling every slot with mining supplies.
- Check your Flame progression. Inspect the danger warning and timer when approaching the Shroud. If it is too dangerous for your protection, return to progression objectives first.
- Set one crafting target. The basic tin smelting batch below needs 10 Tin Ore. If you want several batches, count the fuel and Wood Acid as well.
- Plan where to leave the Shroud. A marked fast-travel point is useful for the wider trip, but do not rely on teleporting directly out of a mining position in the fog.
For the general preparation loop, see the beginner guide.
Mining route
- Open Mining Rift on the linked map. Use an unlocked Nomad Highlands travel point if it gives you a practical approach. The named mine and the individual tin deposit markers are different things.
- Choose a deposit before descending. Follow its height and surface information. Inspect the entrance or exposed terrain and identify the return path.
- Deal with immediate threats. Look around the approach and your mining position before putting your weapon away. The location listing includes hostile creatures; it is not an empty quarry.
- Mine a small test piece. Check the pickup notification or inventory for Tin Ore. Nearby copper and other minerals can make the location alone an unreliable identifier.
- Collect your target and leave with a margin. Recheck the timer and tool durability during the batch. Stop early if either threatens your return.
Success check: the Tin Ore inventory count increases. If you receive another mineral, move to the selected vein rather than continuing to excavate ordinary surrounding rock.
If Mining Rift is inconvenient, the same deposit listing provides other Nomad Highlands choices. One listed open-air deposit is about 170 m north-west of Conway Camp. Use that entry's map pin to locate it; this direction is relative to the camp, not the Ancient Spire. It is an alternative location, not a guarantee of an easier encounter.
Recognize the vein
These stills show a separate location near the Nomad Highlands Ancient Spire in HeRo Survival Guides' video. They illustrate vein identification, rather than the Conway Camp deposit pictured above. The video's map check at 01:05 places its player marker north-west of the Spire.
Look at the pale mineral chunks in the rock above the character's head in the first image. In the next image, the left-hand pickup notification says Tin Ore ×5. That name confirms the material; the displayed quantity is an example from the video, not a promised yield for each swing.
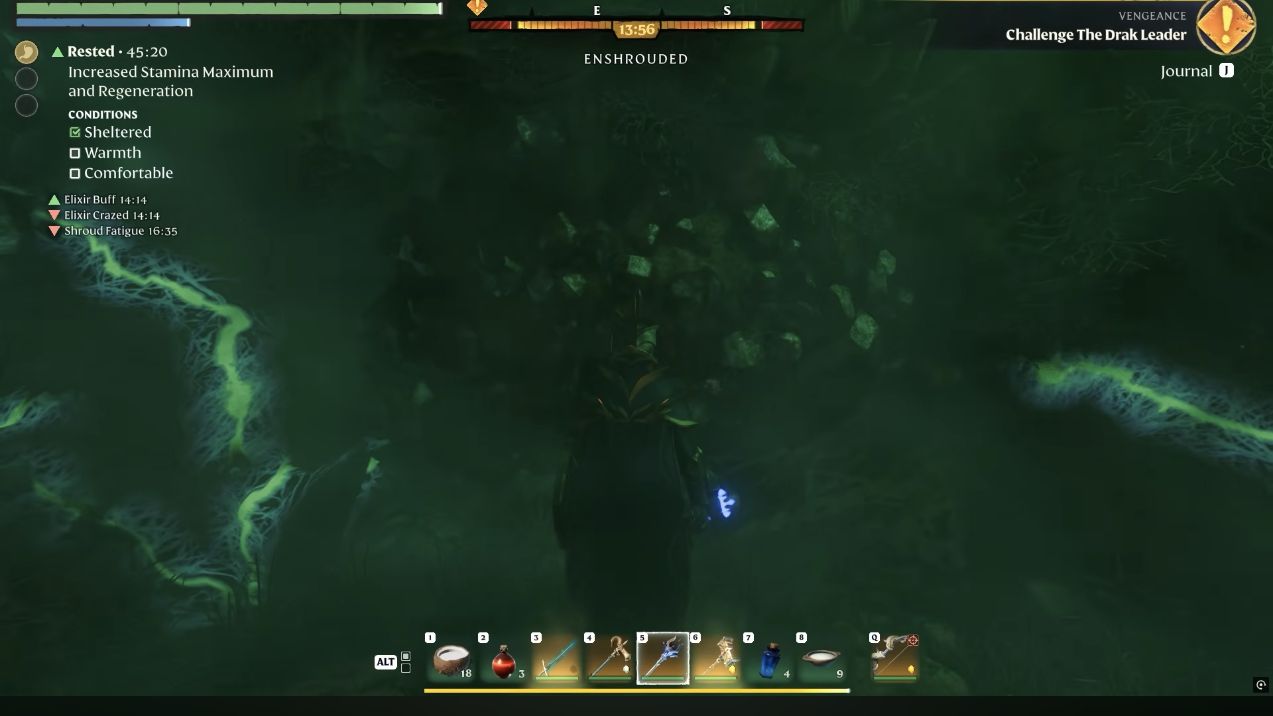
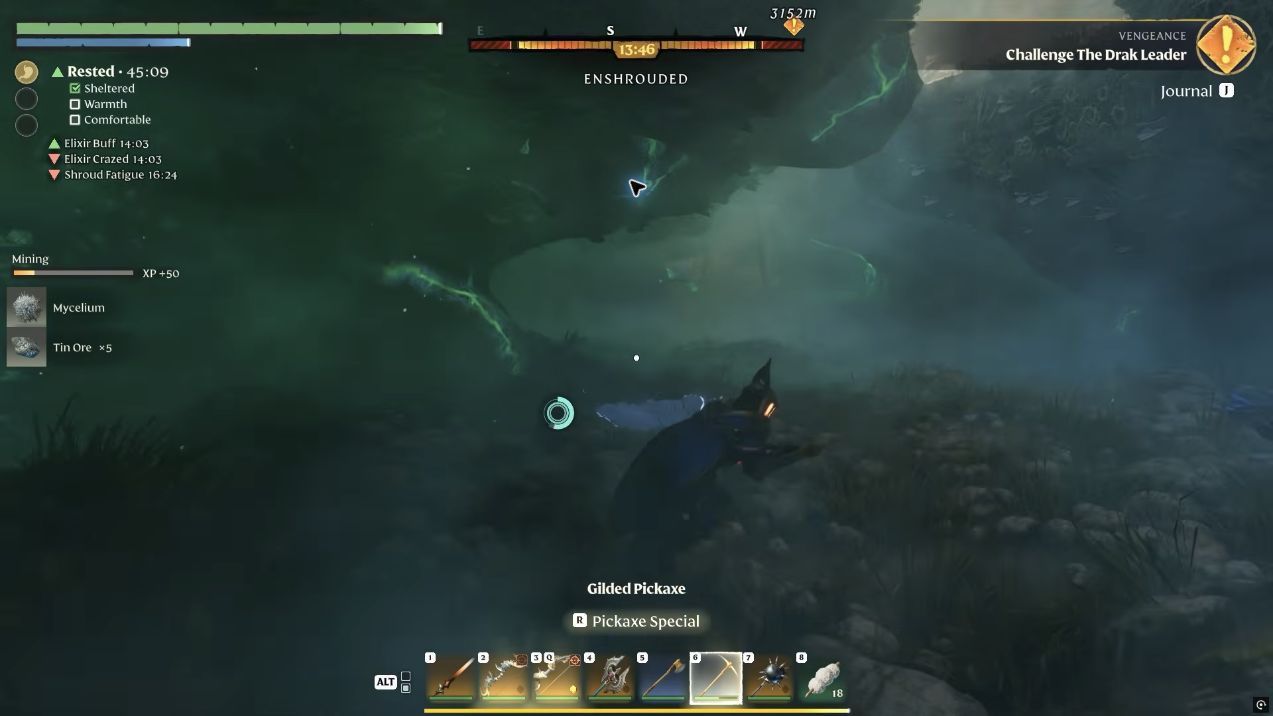
The solid blue outline that appears during the video's pickaxe action is a targeting overlay. Use the mineral chunks and the pickup name for identification, rather than expecting the untouched rock to have that outline.
Confirm the item
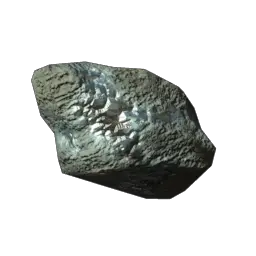
After a test swing, check the pickup name or open your inventory. You want Tin Ore, not Tin Bars, Copper Ore or ordinary stone.
The icon helps confirm what you collected. Lighting and surrounding rock make a vein harder to identify, so the item name is the success check.
Video reference
Tin Ore Location in Enshrouded
HeRo Survival Guides
See the rock crevice, vein and pickup confirmation in the original creator's footage. Keep the current deposit map handy when choosing where to travel.
Watch on YouTube ↗Jump to 00:15 — Nomad Highlands Spire, 01:05 — location on the map, 01:28 — vein close-up or 01:35 — Tin Ore pickup.
These key scenes were visually checked on October 31, 2026. The creator's character, gear and displayed Flame level are their own setup, not entry requirements established by this guide. The stills support identification; use your current Shroud warning and equipment to decide whether to enter.
Crafting
Tin Ore, Tin Bars and Bronze Bars are three different inventory items. Mining supplies the ore; the Smelter processes it. Do not put raw tin into a recipe that asks for bars.
| Smelter job | Ingredients for one batch | Output | Listed time |
|---|---|---|---|
| Smelt tin | 10 Tin Ore, 10 Charcoal, 2 Wood Acid | 10 Tin Bars | 4 minutes |
| Make bronze | 7 Copper Bars, 3 Tin Bars, 10 Charcoal | 10 Bronze Bars | 4 minutes |
These are Smelter batches. The Blast Furnace has different batches and fuel requirements; follow the recipe for the station you actually have.
Tin bars
At home, load the Tin Ore, Charcoal and Wood Acid listed in the Tin Bars recipe. Check that the station has started, then collect the resulting Tin Bars when the batch finishes.
Bronze bars
Reserve Copper Bars, Tin Bars and enough additional Charcoal for the Bronze Bars recipe. Start this as a second Smelter job after your tin batch is ready. Your mining trip has not finished the alloy by itself.
Troubleshooting
Missing tin bars
Check that you are using a Smelter and have Wood Acid as well as Charcoal. If the station is missing, follow the Blacksmith's Crucible Needed For A Smelter progression. The quest reference separates retrieving the Crucible from crafting the station.
Bronze ingredients
Smelt the ore into Tin Bars first. The bronze recipe uses Copper Bars, not Copper Ore, too. Confirm all ingredient names in the recipe rather than only their metal names.
Repeat visits
This route does not depend on a reset trick. Gather an amount you can carry home, mark the deposit, and choose another mapped vein if the first is exhausted. A tutorial's relog loop is not a promise about your server's behaviour.
Sources
Checked October 31, 2026, for the 1.0 era. Enshrouded.tools identifies its database as game build 25988036. Travel and packing steps are editorial recommendations based on published information, rather than a timed in-game farming test.
- Tin Ore: biome and mining
- Tin deposits and Conway Camp alternative
- Mining Rift: region and nearby minerals
- Tin Bars: ingredients and stations
- Bronze Bars: Smelter and Blast Furnace batches
- Crucible Needed For A Smelter
Visual references
- Map screenshot: selected Conway Camp deposit, checked against the Tin Ore listing. The live popup identified Tin Ore at the listed location.
- Inventory icon: Keen Games game asset served by the gaming.tools Tin Ore reference. This shows the collected item, not an in-world vein.
- HeRo Survival Guides — Tin Ore Location in Enshrouded: selected map, entrance, vein and pickup scenes visually checked October 31. Stills above are captured from approximately 01:28 and 01:35; their location is separate from the Conway Camp map example. This is footage verification, not an in-game route test by this site.